06 July 2010

Scrapbook layout plus fabric scrapbook album cover

I stayed up til 2am working on this layout about Angie and his dinosaur toys. It was a fun one to do, without agonising about layout or papers like I usually do.

I tried pink stitching with red gingham which I'm very happy with. And Sassafras Lass paper.

And the little details I keep coming back to: journalling strips on vintage notepaper and the date stamp. I also used my new oil pastel crayons to colour the edges. Perfect on a child's layout.

The title I printed using Word on the computer and doddling on the edges. Too easy!


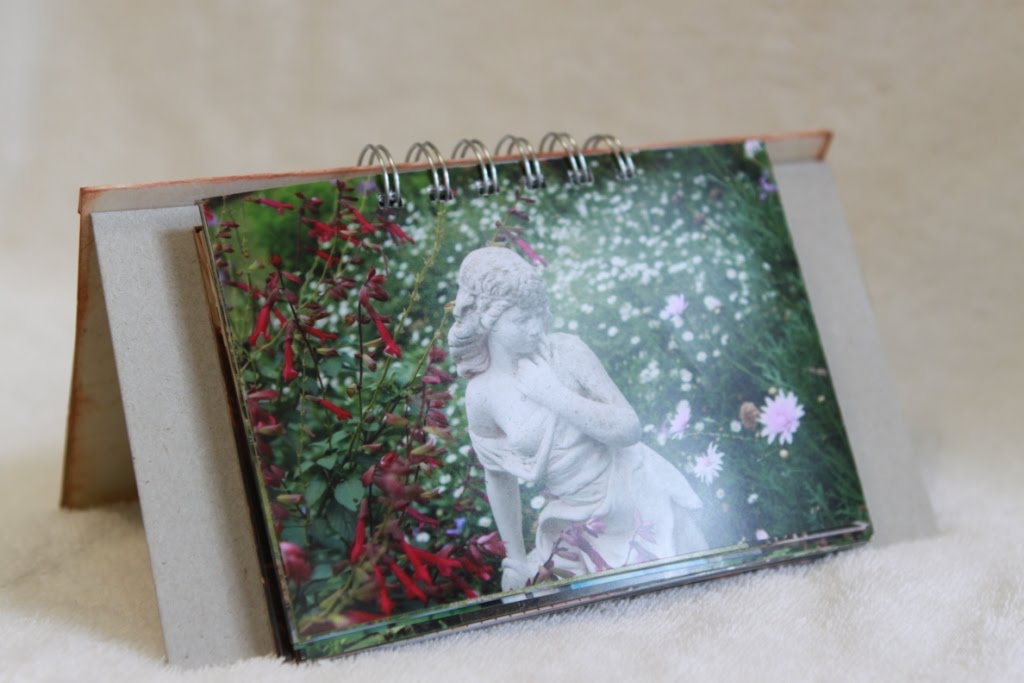
And this is the calico cover I machine stitched for my new baby niece's album, with handstitching detail. I'm pretty happy with the result. Find the tutorial here. The only thing I would add is to leave a small allowance at the top and bottom edges so you can get the album cover into the pocket!

and here is a layout I completed a week or so ago. I experimented with my new water pen using watercolours for this. Great fun. I bought this paper (Making Memories) to match my sister's dress. The edges is coloured with oil pastel crayon.

05 July 2010

birthday card

Card for Mike's birthday.

29 June 2010

New mixed-media art scrapbook page and plans for July

I apologise fior the poor quality photo but even on such a poorly lit rainy day, I had to show this layout. I've been really enjoying Donna Downey's Inspiration Wednesdays and decided to make own page using paints and inks. It was such fun. I painted the background with watercolour, which is why the corners are curled, and stamped over the top. It was a great way to use two rather ordinary little photos that had been in a fridge magnet frame and turn it into a story. I added some handmade paper for the mat, journalling strips made on the computer and printed out, my new watercolour pen to paint in the brown butterflies and a lunchbox lid to make tiny circle patterns. And i've been using acrylic stamps again, since the great recent re-organisation!

Materials: plain white cardstock, Faber-Castell watecolour pencils, Mont Marte watercolour paint, Tim Holtz and Versacolor distress ink, Fancy Pants Desgins, Inkadinkado and Stamp-it stamps, handmade paper from local craft market

Ah yes and plans for July. It's been driving me crazy for years that my sister and I have these fabulous collections of photos from our childhood and they are in boxes, and various albums, some with her, some with me, and none of it in any sort of order. And they're starting to fade. Some have already been damaged from years in a humid climate (Darwin) and non acid-free photo albums.So....I am going to scan them all in, put them in order, then house them in albums. My sister will keep the originals and I'll keep the copies. And a whole month should be plenty of time, right? Stay tuned.

Grandma's legacy

I realised the other day that I still have these yellow handled scissors. My dear Grandma, God bless her, sent me these as a present when I was about 10. It's remarkable that I still have them, seeing as I've moved about 15 times since then, don't you think? It's also remarkable, because I also recognise that she, too, was a scrapbooker, and now I am too. She didn't have any fancy papers or embellishments, but would make holiday books for my sister and I, with authentic bits and pieces like tickets and drawings and maps, and of course lots of photos, journalling and even her own diagrams. She did this in the 70's and 80's and I guess stopped after that as we were too old. Thanks so much Grandma for showing me the way. And if you could see my work, I'm sure you'd be proud xxx

24 June 2010

digital scrapbooking

I'm experimenting with digital scrapbooking. This is an Ali Edwards designed page which really tickles my fancy. Cute huh?


I went and bought some more scrapbook albums today. I am planning to create some 12x12 inch scrapbook pages all digitally for the 2007/2008/2009 albums. I want to do a monthly page for each month of these years and thinking about how I might do it. The rest of the albums will be filled with scrapbook pages - the lumpy and bumpy kind. I may end up getting them printed locally, otherwise Shutterfly will cost me about $6 per page. I'm shopping around for digital templates at the moment. Or should I just create my own template? I want to be able to drop a photo into a pre-set frame without cropping or trimming.

22 June 2010

New look for Rock Paper Scissors

It's been time for a new look for poor old rock paper scissors scrap. I've been having a bit of fun mucking around with some digital scrapbooking. It's actually more fun than I thought.


...bye bye to the old header. .. I decided to keep the fonts (1942 report, CK Ali) and typewriter image, though. It's a real typewriter which sits on my desk (it's tiny!) and works as a real pencil sharpener. The blog wouldn't look right without it.

21 June 2010

Scrapbooking layout - baby's first Christmas

I've always loved this photo taken of we three: Tassie's first Christmas. She was only about five months old. There's another version of this photo that I also love, which I plan to scrapbook for the christmas album. I like to try different techniques when I do scrapbook pages, so this time I added a book page, which I haven't done before, and a crochet doily. Love 'em.


Materials: Cardstock: Kaisercraft, Paper: Fancy Pants designs, coffee filter, chipboard: Five Kids and a Dog, feather, Scallop border punch: Fiskars, ribbon: Francheville, ink: Versacolor, StazOn, stamps: Sugar Shoppe, Inkadinkado.

Now that I'm organising my acrylic stamp collection, I'm looking foward to doing a lot more stamping. They're being organised into CD cases, which is such a clever idea. Simple. Will upload photo when finished.

18 June 2010

finally - a scrapbook layout


This is the only layout I have managed in the past few weeks. When I returned from the Melbourne trip, I sort of decided to prioritise sleep. I know! Pretty kooky. But my husband is right about how important it is. I'm feeling quite reenergised, so hope to get a few more done, starting today. Will keep you posted!

Journalling reads: You runs straight over to the play equipment and go for it. You don't want any one holding your hand and you are very decisive and confident about what you want. You love to indroduce yorself "I'm Tasmin amanda Smith".

07 June 2010

portrait project

My sister, cousin and I were lucky enough to visit the National Gallery in Victoria last Monday when we flew down for my cousin Noni's wedding. I was so enthralled to be able to see a portrait exhibition called 'Timelines' (see poster, top left corner, picture below).

By a weird coincidence (I love weird coincidences) one of the subjects in the portraits was a girl my sister went to school with in little ol' Darwin. I think her name is Anna Phillips. She's in many ads on TV. But I digress.

I was so inspired I decided to give portraits a go and started with my Mum.


While I was surprised to find she was a difficult subject to capture (she wasn't able to be expressionless for me) I was so delighted when I accidentally saw the images together in a collection, see above. My sister tells me it's the best work I've ever done.!!! Wow, that's quite a compliment.

Anyway, I scribbled some notes, since there was a gruff looking security guard woman sitting on a chair and glaring at me (I was carrying my camera around with its enormous lens sticking out)
and I was too chicken to take any pictures. The main ideas I wanted to remember are:

  • the effectiveness of a gnarly wooden fence for a background
  • doing a 'then and now' portrait years apart, in exactly the same spot (black and white, then contrasted with colour to show 'now')
  • scapturing the subject without smiling but looking directly at the camera
  • framing an interesting portrait then handwriting below the subject directly on to the mat
  • closeups of hands especially two pairs of hands eg. grandma and child, or hand holding an object (teapot, wedding ring)
  • portraits of elderly ladies really dressed up
  • an eye (closeup)
  • from the floor, capturing a Daddy holding his baby's hands as he walks (showing their legs from the knees down)
  • before and after (pregnant woman, then woman with baby)
  • a reclining portrait where the subject stretches from the bottom left hand corner to the top right corner
  • black and white photos printed on to cardstock then coloured with pencils in all the colours of the rainbow using a cross-hatch technique
What was so affirming at this exhibition, was a black and white photograph of a mother, nude, with her little four year old boy, taken by a very accomplished photographer. He was the Daddy and the note said he had been taking their photos, particularly the mother's, almost daily for 20 years.

Hello! And they say 'obsessed' like it's a bad thing???????????
the letters to Jessie project

i was so fortuante to be able to borrow the letters that my grandfather, Frank Middleton Risk, sent to my Grandmother Jessie, during the second World War. The letters had been kept for years in a little photo envelope but some had started to come apart at the edges and were in need of TLC. The best thing to do, I decided, was to place individually inside page protectors in a scrapbook album - I plenty of those on hand! - and sew down the seams to keep the letter in place. If you see above, the seam leaves a little pocket on the right hand side.

Frank Middleton was my Dad's father. They look so alike. The letters in Frank's voice were surprisingly warm, loving and caring, referring to Jess as 'Sweetheart' often. I guess it was easier to be lovey dovey in a letter than face-to-face. When my own Dad wrote letters to me as a child - so glad Grandma kept them in the holiday scrapbooks she made me - he used a similar loving voice.

The letters have all been lovingly and carefully scanned so sometime in the next few months I plan to make a photo book from the scans and try and recreate a bit of the intimacy of personal letters - something I didn't quite achieve with the enormous album.
But at least they're safe now.

05 June 2010

Simplest photo book ever


I wanted to make a mini-book out of a stack of photos I had, a little more than 40 I think. I've been wanting to try this for ages. I just used my Bind-it-all to punch holes straight into the photos and used a bit of leftover cardboard as the front cover. For the cover design, I printed the first photo directly onto patterned paper in my printer and I'm so pleased with the result! I inked the edges and it was finished.
And my Auntie Shirl, who I made the book for, loved it and took it to show her friends at the bowls club. She has bought a new house and will be moving soon. These are photos of her house and garden.
You can see the layouts I made from the photos here.

27 May 2010

Two new scrapbooking page layouts

I seem to have found my mojo again today. Hooray! I did a whole new layout today, which proves that I CAN do a quick layout - it is possible! It's a little hard to see in this scan, but the Bazzill cardstock is the natural cream colour which I love. I can really imagine using this more. I had fun with some green handmade paper I had in my stash and I printed my font straight on to it on the printer then cut it out. It's a pretty shiny paper which you can't quite see in the scan. I used a little scallop circle at the top to highlight the colour.

Since printing these photos I've also learnt to increase the dpi when photoshopping the photos to a smaller size to keep the resolution quality. It had been set quite low to 72 so I've increased it to 400. May replace these photos with new prints. The little tissue paper flower was a leftover from the 'Edible Blooms' I made Mum. The hearts were made by drawing on white cardstock with white crayon as a resist then covering over with paint. Easy!


I had a bit of fun trying this text flower, tutorial here. Obviously I need a bit more practise, LOL! I painted a little die cut frame I had with orange paint, then went over it with Crackle Medium. I used a little ink to highlight the crackle. I need a lot more practise to work out how to make big giant cracks, which I prefer. I might post some close up pics tomorrow if I remember.


I'm off to Melbourne on Saturday so one thing I need to do tomorrow to get ready is put the letters from my grandfather, Frank Middleton Risk, (to my grandmother Jessie, during World War II) into an album, so they can be returned to my auntie. Ian scanned them all in for me this week, what a legend! Luckily he did it before the bug got him (he's really under the weather today).

19 May 2010

Cool discovery - freebie - Kamera dings


These are so cute... I discovered them over at Write Click Scrapbook and you can find them here. They're perfect for a layout I have in mind about a certain someone who takes a lot of photos.......

18 May 2010

Day 18 - Billie

I was glad to finish this layout tonight about my cat, Billie. It's been a very challenging month, being the third week of caring for my babies, who are fighting infections. I've been sleeping every chance I get as Ian and I are up every night with Angus. Looking forward to getting back to normal again.

Materials: Cardstock - Creative Memories, paper - Kaisercraft, paint - Kaisercraft, rubber stamps - Heidi Swapp, Imaginisce, distresser, ink - StazOn, Splendor, journalling pen - Copic multiliner, ribbon - American Crafts, date stamp.

Journalling: Sweet, loyal little Billie cat. You've been with me since 1995, when you were just 6 months old. 15 years later, you're still with me. Your cutest trait is the way you trot so happily over to me for a pat when you see me outside at the clothes line!

12 May 2010

Day 12: a layout a day in May

Ahem, I know I skipped days 5 - 11 but it was a rough week so I decided to start again today. I wanted to keep this layout really simple as I loved the story told by the three pictures of Ian with Angus.

This is one of those happy serendipities where you pick up the camera not really expecting anything and end up with really great photos!

Materials: black and white cardstock, paper: My Little Shoebox, date stamp, StazOn ink, Heidi Swapp paper distresser, circle cutter: Creative Memories, rubons: Presstik alphas, Kaisercraft.

10 May 2010

photoshop fun

I took some pregnancy pics of my sister Manda yesterday and then discovered a cool new trick in Photoshop Elements. To start, here's the before:


'After' - this is a circular vignette, a simple action you can find under in 'Effects' above the layers panel in Photoshop Elements (version 7). This is possibly my favourite one. Then I decided to play around with the photo as black and white, a function you find under 'Enhance' in the menu bar. I then used the Magnetic Lasso Tool to select the subject, went to 'Select' then clicked on 'Inverse', then Ctrl+J (PC computer) to create a new layer with just the background. Cool! then I just played with different effects available in "Effects" above the layers palette.

This one's Pencil...

Patchwork... Notepaper...

Fibers...

Ocean Ripple... there are many more, but I'll choose one that focuses on the subject because I have this lovely scrapbooking paper that is the exact match to my sister's dress.

Something! Mothers Day 'edible blooms'

For ages I've been wanting to make 'edible blooms' - which aren't really, as my husband (holding the bouquest for me) points out. These little flowers are just made with the Fiskars scallop circle punch,and I punched coloured tissue paper while it was folded to make several scallops at once. I then just added a brad to the centre and fluffed the paper up a bit.

You can find more about it here.

Then I stuck them on to a wooden skewer. The chocolates are spiked with the skewers and then added into the bunch. I added bits of green paper to look like leaves and it does kinda sorta look like a bunch of flowers! I always keep the wrapping from bouquets when I receive them so I had some handy to use.

Mum seemed pretty happy. All the pics from Mothers Day will be posted at Scrap Happy Valley shortly.

06 May 2010

day five - nothing

Oh dear. I'm afraid I came unstuck yesterday. It's been a long rainy week, this week, and very challenging having both babies sick, the husband away from Monday til Friday, daycare cancelled on Tuesday, shopping skipped. I've been trying my hardest to keep my head above water and to top it all off, I received some rather harsh criticism last night that's really got me questioning myself. I didn't get to sleep til after 2am then had to be up again at 6am. Tasmin's always been an early riser. So there you have it. It's back to the drawing board.

Anything to be grateful for yesterday?

Well Mum came over late morning to play with Tasmin, which gave me prep time for my teaching job. Thanks Mum. And my 7 months pregnant sister came over at 4pm to feed the babies and put them to bed while I went off to work. So yes, I'm grateful for her. And third, I'm grateful that I took the time to call the police on my way to work to report a broken down car. There was a very long line of traffic banked up behind it, and the driver's wife was holding a tiny baby as she stood on the road beside the car, halfway up a steep hill, on a blind corner with no footpath, and cars crossing the double line in order to get home. A great recipe for a head on collision. No one else had called it in. I followed my instinct and you can't ask for more than that.

05 May 2010

day four - your first steps

I was up until 12.30am finishing this one last night, but at least it wasn't 3 or 4am as I've been known to do in the past! I was listenening to an audio book at the same time, which I've never done before, but a great way to read books while scrapping. It's Never Let Me Go by Kasuo Ishuguru. I'm halfway through.

This layout is a scraplift based on this layout by Kathie Link. It's soooo fabulous. I was so happy with the way it turned out, even though Kathie's original is based on a Cropaholic kit she designed for Shop and Crop. It's definitely worth putting in the time on layouts sometimes, as I think I'll treasure this for years to come, and so will Tasmin hopefully!

Techniques learned:
I learned a lot, from having to improvise. I used a resist technique for the hot pink heart flower, by drawing on white cardstock with white crayon then dry brush painting over. When it was dry I applied Pod Podge to seal it. I made the green mat for the photo by using blue ink to stamp an image around the edges, so it looks like a patterned paper. I used orange ink to colour the hearts, then stamped in pink over the top with a flower design. Pretty effective, eh? The curled paper at the bottom is inked underneath to look like double sided paper. I used a paint brush to help roll the papers. Also, one of Kathie's techniques I love is the way she chooses coloured cardstock for the layout's border, but then a more neutral colour for the background. I never would have considered using the paper I did, normally, as it looks really plain on its own. But it works, somehow!

Materials: K&C Company green cardstock; paper: Grant Archival, Bella!, Heidi Grace Designs, Kaisercraft, Sassafras Lass Monstrosity; ink: Splendor, Versa Color; yellow foam cut for flower; brads; Kaisercraft paint; white crayon; stamps: Inkadinkado, Fancy Pants Designs; pen: Zig Writer; buttons and stitching.

Journalling: The story: 1. in the morning, you simply picked up the remote control and took your first steps, walking towards the TV! 2. That day we took Ga out for Yum Cha (early Fathers Day treat). 3. Neighbours Steve and Desiree moved in and 4. Peter's 6th birthday, where the photo was taken.

04 May 2010

layout number 3 - fathers day 09

After my Dad passed on last year, I got angry with myself thinking of all the things that I didn't do, could have done, should have done. For some reason, I didn't take any photos this particular day - which turned out to be our last Fathers Day with my Dad. But I've been learning that you don't need to be limited by photos when scrapping stories, and for this layout I used the scans of the fathers day cards.

Materials: Black paper unknown, Zig Writer, Jewellery Bitz, Versa Colour Ink, Stitching, mod podge, cardboard from old box, date stamp, Staz On ink, Signo gel pen, Bella! tag.

Journalling reads: Everyone came over to our house for lunch on Fathers Day - Manda and Mike brought Dad, and Mum came too. So grateful Dad was able to come, thought it wasn't easy for him. We all watched the 10 minute slideshow I'd made based on the album of Dad's early life story - but it included recent photos. The card I made is based on one of his favourite sayings. heart u Dad xo.

03 May 2010

First two layouts SO FAR

1. Love is.... this was kinda easy as I already had the enlarged photo stuck on a piece of 12" white cardstock but it had been sitting around a few months. I do like it and it's OK for a home print job too (but note to self, only print high resolution pics!)

2. When I have extra favourite photos that don't fit in the 365 project, I set them aside for scrapping. Sometimes I print two copies, knowing one will be scrapped. So I have a pretty good supply of photos ready. This one was just fun. I know the butterfly makes the page a bit too busy but it so suits the photo, don't you think!
There are two more layouts, one missing a tiny detail that I will upload tomorrow and one that er, I haven't done yet. I have the photo and concept ready, but can't quite decide on background paper. Here's the plan: five minutes, choose a paper from the shortlist pile, then go to bed and do it tomorrow! I didn't quite get to it tonight as I've been getting photos ready for developing tomorrow. There's always a reason!

01 May 2010

CHALLENGE: A layout a day in May

It's on! The inspiring and talented Karenika came up with this idea in her blog and I immediately knew I had to do it. I often spend too long researching the perfect layout with each photo or group of photos I want to scrap and I need to challenge myself to make some quick decisions - then STICK and GO!

I think it will be really fun to have 31 finished layouts at the end of the month.

There are some things I simply have to do this month for others - scanning precious heritage photos and letters I have on loan from relatives and starting and completing a mini heritage album for my Mum for her birthday in June. And there's the 365 Project but I have Tuesdays set aside specifically for that. So.... here we go!

And yes, I did my first layout today. And finished it. I will upload it tomorrow.

30 April 2010

more pages

It's always a challenge getting multiple photos on to one layout but I like to slice and chop to make them fit. The first one is such a great reminder of my Auntie Shirl's house and garden in Melbourne where I visited last month for my cousin's wedding. So glad I have these photos since she plans to move soon.
Materials: Bazzill cardstock (kraft), Kaisercraft paper, Versa Colour ink, American Crafts ribbon, Staz On ink, date stamp, Zig Writer
journalling: Manda and I flew into Melbourne on Virgin took a dodgy cab to Auntie Shirl's and accompanied her to an auction (house went for $500k). We were shocked to hear she and Ken may sell the house - the house she and her first husband Barry built more than 50 years ago! She has the most beautiful garden and I will miss it. It inspired me to have my own beautiful garden.
Below: I punched many photos with my 2" square punch to fit these on one layout. It's a great reminder of that night.Journalling reads: Almost all Shirl's family came that evening to see us and celebrate Phil's 50th. The boys caused a small fire playing with candles during Earth Hour and entertained each other with ghost stories. 5.30 til midnight. Auntie Shirl can sure make a feast.

Double scrapbook layout share

Click on photo for a larger view.
For a pretty simple layout this one was weeks in the making. Not really, it's just that I was too chicken to get the sewing machine out and finish off with some stitching. Since I'd had to take the machine back to the repairer, I really lost my confidence. Anyway, it was all the worth the wait as the machine is working just fine. I really had fun with the stitching.

Supplies: Bazzill Cardstock (kraft), Bella paper, Versa Colour ink (sky blue), gingham material, ric rac, felt, stitching, used carpark ticket, American Crafts ribbon, date stamp, Staz On ink, foam cut title, crinkle machine, Fiskars punch, Copic black multiliner.

Journalling reads: 1. Pa cuts the cake (made by Nan) after the speeches, 2. Daddy c hats to Sid; 3. Tasmin discovers nan's clever folding mirror dressing table; 4. and has a cuddle with Nan; 5. Tas loves dressing up with Nan's beads (a tradition started by cousin Daniel); 6. Angus, Daddy, Barbara and Tasmin near Pa's birthday card collection; 7. Pa's game of Boules (circa 1950's?); played outside by children; 8. Angus was getting tired for his nap by the late afternoon; 9. time for one quick photo with Pa. It was a lovely celebration and Mummy enjoyed being the "official" photographer.

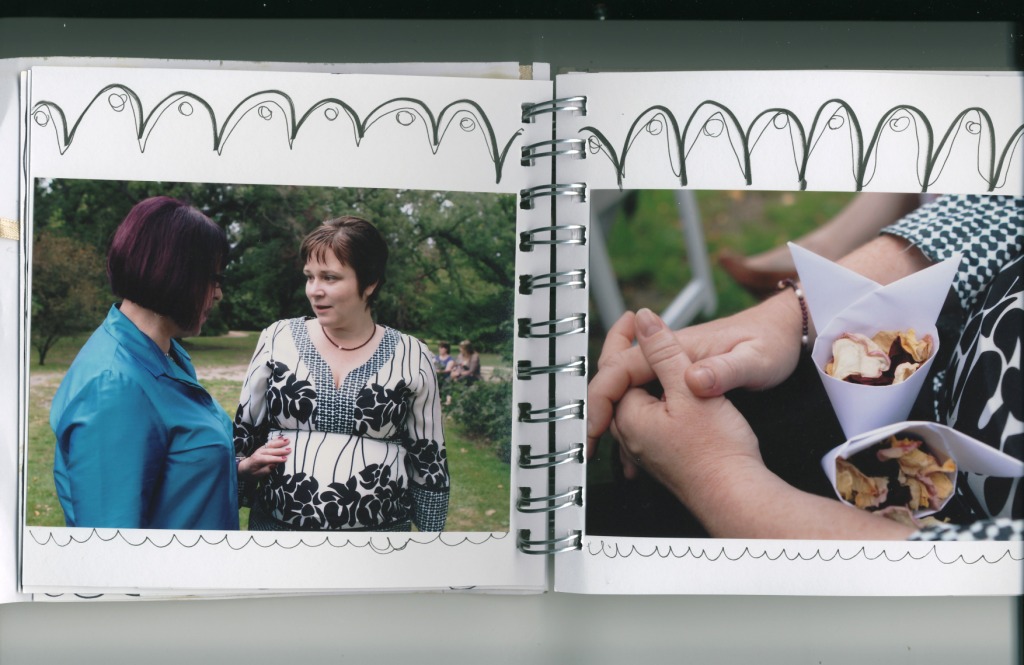
Wedding mini book

Making mini albums like this is a great example of how doable it is to make something cute when there isn't much time. I used my Bind it all to make the book - that took about 20 minutes, after cutting 12" paper into 6" squares and then binding them with recycled cardboard from packaging around the house. The cover is just some patterned paper adhered on with a little ribbon and hand written title. I scanned in the card I made and stuck it on the first page. I decided to use only two or three stamps throughout the album to keep it simple, in the same colour (Tim Holtz antique linen and Staz On black). The rest is doodled with my pen.
A bit of the boarding pass...
The tag from my bolero jacket...


My sister's baby bump...


The lovely couple and my horded confetti...


The place card...


There are many more pages but you get the idea. I'll post a link to the finished album later. Just need to print a couple more photos and finish with a little more stamping. Oila!
Related Posts Plugin for WordPress, Blogger...